To set up VIP alerts on your smartwatch, first guarantee both devices are paired via Bluetooth with notification permissions enabled. Open your smartwatch’s companion app and designate specific contacts as VIPs through the settings menu. Customize these priority alerts with distinct sounds, vibrations, and visual indicators like hearts or stars to differentiate them from regular notifications. Test the functionality by having VIP contacts send messages, and adjust Do Not Disturb settings if alerts aren’t appearing. These foundational steps will release your smartwatch’s full VIP notification potential.
Understanding VIP Contact Designation and Priority Settings
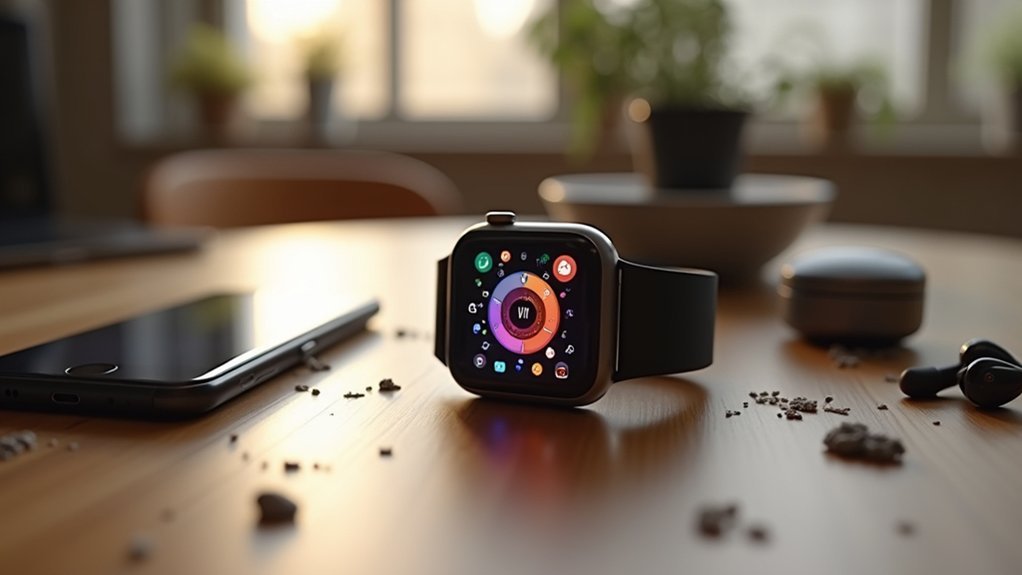
Managing your smartwatch notifications effectively starts with understanding VIP contact designation—a feature that lets you mark specific contacts for priority treatment. When you designate someone as VIP, their messages trigger distinct alerts that stand out from regular notifications.
You’ll notice visual differences too—VIP contacts often appear with unique icons like hearts or stars, and they’re grouped separately for quick access. These alerts can be further enhanced by adjusting your device’s touch sensitivity settings to ensure reliable interaction even when wearing gloves during activity.
This system offers significant benefits for your daily routine. You’ll experience reduced distractions since non-essential alerts get filtered out, ensuring critical messages aren’t missed. The feature helps manage information overload while enhancing safety through prioritized emergency contacts.
Most smartwatches sync VIP settings from your paired phone, though some platforms require manual setup for each contact.
Pairing Your Smartwatch and Enabling Basic Notification Access
Before you can set up VIP alerts, you’ll need to pair your smartwatch with your phone through Bluetooth and install the companion app for your device.
Once paired, you must configure notification permissions on both your phone and smartwatch to allow alerts to pass through. For Wear OS models, you can access Advanced notification settings within the Galaxy Wearable app to customize options like notification indicators, reading notifications aloud, and showing notification details.
These foundational steps guarantee your smartwatch can receive and display the priority notifications you’ll designate for your VIP contacts.
Bluetooth Pairing Setup
Once you’ve confirmed both your smartwatch and phone have sufficient battery charge, you’ll need to enable Bluetooth on both devices to establish the initial connection.
Navigate to your phone’s Bluetooth settings and power on your smartwatch to make it discoverable.
Download your smartwatch’s companion app—whether it’s Wear OS, Samsung Galaxy Wearable, or another brand-specific application.
Launch the app and follow the prompts to begin pairing. Select your watch’s name from the available devices list, then confirm that the pairing codes match on both screens.
Grant Bluetooth permissions when prompted and complete the setup by following the remaining on-screen instructions. During this process, you’ll also need to grant necessary permissions for notifications, contacts, and location access to ensure your VIP alerts function properly.
If you encounter issues, restart both devices and confirm they’re running the latest software versions.
Notification Permissions Configuration
After establishing the Bluetooth connection between your devices, you’ll need to configure notification permissions to enable your smartwatch to receive alerts from your phone. Start by accessing your smartwatch’s Settings menu, then tap Apps followed by Permission manager to adjust app permissions as needed.
| Device | Steps |
|---|---|
| Smartwatch | Settings > Apps > Permission manager |
| Phone | Settings > Apps and notifications > App notifications |
| Companion App | Open Galaxy Wearable or Wear OS app |
| Phone Security | Grant Phone and Contacts permissions |
| Watch Settings | Enable notification access for companion apps |
Ensure notification toggles are enabled for your desired apps in your phone’s notification settings. For Samsung Galaxy Watches, you may need to manually adjust permissions in both phone and watch settings due to OS security restrictions. Note that app permissions cannot be accessed for certain models like Galaxy Fit, Gear Fit2, or Gear Fit2 Pro.
Configuring VIP Alert Settings Through Companion Apps
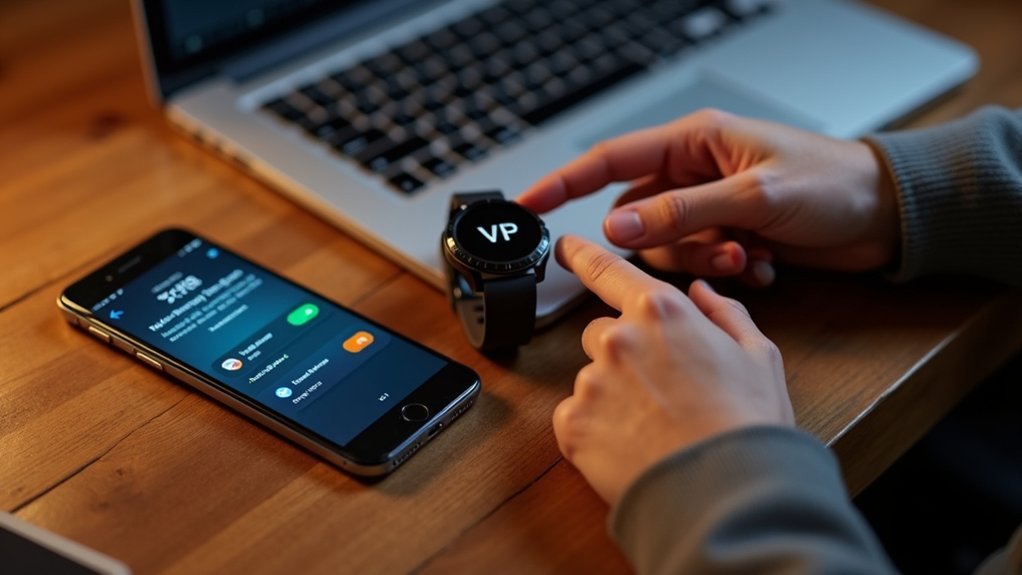
When you need to set up VIP alerts on your smartwatch, the companion app on your paired smartphone serves as your primary control center. Open apps like Galaxy Wearable to access notification settings and manage your alert preferences effectively.
You’ll find options to select specific contacts or apps for VIP status within the app settings. Enable notifications for your chosen contacts to receive priority alerts that stand out from regular notifications.
Prioritize important contacts and apps by granting them VIP status for distinctive alerts that cut through notification clutter.
Customize how these alerts display by adjusting settings to show notifications with or without details based on your preference. Use notification indicators to visually distinguish VIP alerts on your watch screen.
You can also configure notification timing, ensuring alerts appear only while you’re wearing the watch, and enable automatic screen activation for quick viewing. Galaxy Wearable also facilitates changing watch settings to match your specific preferences for how VIP alerts appear and behave on your device.
Customizing Alert Sounds and Vibrations for Priority Contacts
Creating distinctive alert sounds and vibrations for your most important contacts helps you instantly recognize priority messages without checking your smartwatch screen.
However, per-contact customization isn’t universally supported across all smartwatch platforms.
For Android-compatible watches, you’ll need to configure custom notifications through your phone’s settings or the companion app.
iOS users face more limitations, especially with non-Apple Watch devices, though some settings may carry over from your iPhone’s contact preferences. Your iPhone must have Show Previews set to “Always” in the Notifications section to ensure proper sync with connected smartwatch devices.
Most smartwatches default to uniform notification patterns for all messages.
Workarounds include using messaging apps like WhatsApp or Telegram that allow custom chat tones, which may sync to your watch.
Third-party notification management apps can also provide enhanced per-contact alert customization on select platforms.
Setting Up Notification Filtering and Display Preferences

Three primary methods let you control which notifications reach your smartwatch and how they’re displayed. You’ll access these settings through companion apps like Galaxy Wearable, Wear OS, or Garmin Connect. Toggle switches next to each app let you enable or disable notifications selectively. Use filtering features to block unwanted alerts while keeping priority contacts active.
| Watch Brand | App Navigation | Key Features |
|---|---|---|
| Samsung | Galaxy Wearable > Watch Settings > Notifications | Advanced settings, read-aloud mode |
| Garmin | Garmin Connect > More > Settings > Notifications | App-specific customization |
| Wear OS | Companion App > Settings > Notifications | Direct blocking/unblocking |
| All Brands | Theater/Cinema Mode | Temporary silence |
| Universal | Do Not Disturb | Override all notifications |
Configure display preferences like screen wake-up, notification indicators, and vibration patterns to guarantee you’ll notice important alerts. For iOS users, ensure Notification Center is unchecked for apps you want on your Garmin watch but not on your phone’s lock screen.
Testing VIP Alert Functionality and Connectivity
After setting up your VIP alerts, you’ll need to test whether they’re working properly by having your designated contacts send you messages or calls.
Check your smartwatch’s connectivity status to verify it’s properly synced with your phone via Bluetooth or Wi-Fi. Test the connection using protocol analyzers to ensure reliable communication between devices.
If alerts aren’t coming through as expected, you’ll want to troubleshoot common issues like connection problems, notification permissions, or incorrect contact settings.
Test VIP Contact Alerts
Once you’ve configured your VIP contacts, you’ll need to test the alert functionality to confirm everything works as expected.
Start by verifying your smartwatch has a strong signal connection to receive alerts reliably. Ask a VIP contact to call or text you, then check if the customized sounds and vibrations are audible and noticeable on your wrist.
Test the notification display to confirm VIP alerts appear correctly on your smartwatch screen. If your device has SOS features, simulate an emergency situation to validate it sends alerts to your designated VIP contacts properly. Remember that SOS alerts will continue sending every 30 minutes for 24 hours unless manually canceled through your watch settings.
Finally, test functionality across different network coverage areas to confirm your VIP alerts work consistently regardless of location.
Verify Connectivity Status
Before your VIP alerts can function properly, you’ll need to confirm your smartwatch maintains a solid connection with your phone.
Start by checking your Bluetooth pairing status to guarantee both devices recognize each other. Navigate to your smartwatch app and verify that notifications are enabled for your device.
For iOS users, access the Apple Watch app and confirm notifications are set to mirror your iPhone or configured with custom settings.
Send yourself a test message to verify your watch receives notifications correctly. You’ll also want to confirm your smartwatch app supports VIP alerts for your specific contacts. Additionally, check that your device can handle multiple reminders simultaneously, as most smartwatch apps have limitations on the number of active alerts they can manage at once.
This verification process establishes the foundation for reliable VIP notification delivery to your wrist.
Troubleshoot Alert Failures
When your VIP alerts aren’t working as expected, start with the most common culprits before diving into complex solutions. First, restart both your smartwatch and phone to clear temporary glitches.
Check if your watch is in Do Not Disturb or Cinema mode, which silences all notifications. Verify power save mode isn’t activated, as it limits notification functionality.
Toggle notification settings off and on for specific apps to reset their functionality. If problems persist, uninstall and reinstall the companion app on your phone.
You can also disable and re-enable Bluetooth on both devices to establish a fresh connection. For email notifications specifically, try deleting VIP contacts from your phone’s mail settings, as this has resolved notification issues for many users. As a last resort, consider factory resetting your smartwatch and reconfiguring all settings from scratch.
Troubleshooting Common VIP Alert Setup Issues
Even if you’ve carefully configured your VIP alerts, several common issues can prevent notifications from reaching your smartwatch as expected. Start by checking your notification settings in the companion app—ensure the global notifications switch is enabled and notification details are turned on. Verify your watch maintains a stable Bluetooth connection with your phone, as connectivity problems directly impact alert delivery.
| Problem | Solution |
|---|---|
| VIP alerts not appearing | Remove VIP contacts temporarily, then re-add them |
| Delayed notifications | Toggle Bluetooth off/on for both devices |
| Missing app alerts | Enable custom notification settings instead of mirroring |
| No vibration/sound | Check “Show only while wearing” isn’t restricting alerts |
Don’t forget to restart both devices and update firmware if problems persist. Additionally, make sure you’ve granted necessary permissions for the companion app to access your contacts, as this can prevent VIP alerts from functioning properly.
Frequently Asked Questions
Can I Set Different VIP Alerts for Work Versus Personal Contacts?
You can’t set explicit work versus personal VIP alerts natively, but you’ll achieve similar results by creating contact groups on your phone and customizing notification patterns per group through your smartwatch’s companion app.
Do VIP Alerts Work When My Phone Is in Do Not Disturb Mode?
Yes, VIP alerts can work when your phone’s in Do Not Disturb mode if you’ve configured exceptions. You’ll need to manually set allowed contacts in your phone’s Do Not Disturb settings first.
Can I Schedule VIP Alerts to Activate Only During Specific Hours?
You can schedule VIP alerts for specific hours on many smartwatches through notification settings or compatible apps. However, this feature isn’t available on all devices, so check your smartwatch’s capabilities first.
Will VIP Alerts Drain My Smartwatch Battery Faster Than Regular Notifications?
VIP alerts won’t notably drain your smartwatch battery faster than regular notifications. You’ll experience minimal impact unless you’ve heavily customized settings that trigger frequent screen activations or additional processing features.
Can I Set up VIP Alerts for Group Messages or Only Individual Contacts?
You can typically set VIP alerts for individual contacts, but group message VIP features aren’t universally supported. Most smartwatches prioritize specific people rather than entire chat groups, though some messaging apps offer limited group notification controls.
Leave a Reply