To adjust your fitness tracker’s brightness for ideal visibility, access “Display & Brightness” in your device menu and choose between manual or automatic control. Use 0-25% brightness for nighttime, 26-50% for indoor environments, 51-75% for most situations, and 76-100% for direct sunlight. Manual control offers immediate customization and better battery management, while automatic sensors adapt seamlessly to changing light conditions. Proper brightness adjustment combined with screen timeout settings can extend your battery life by 20-30% and guarantee you’ll discover additional enhancement techniques.
Understanding Display Brightness Settings on Fitness Trackers
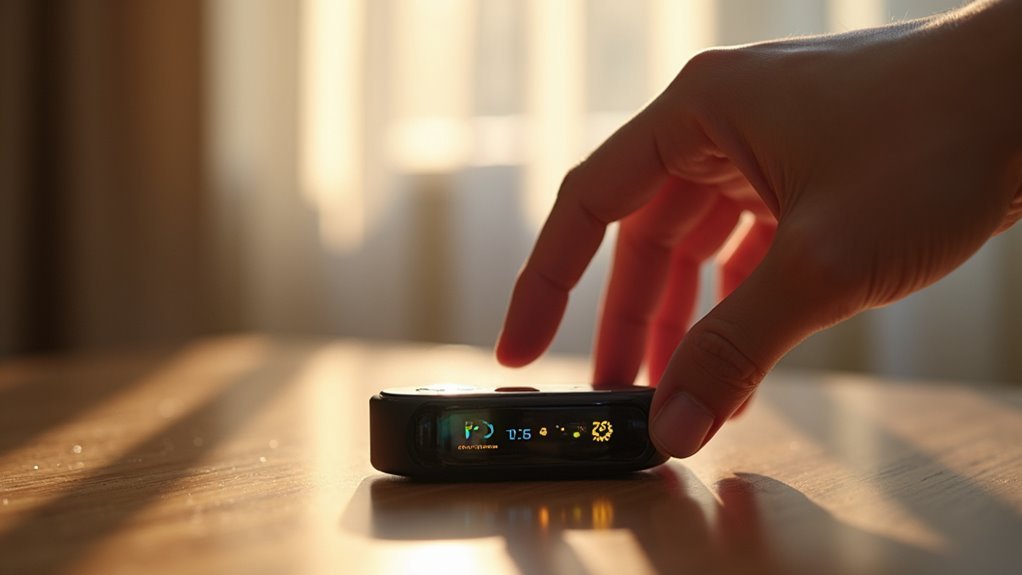
When you’re trying to read your fitness tracker’s display, the brightness setting directly determines how clearly you’ll see the information on screen. Most fitness trackers offer multiple brightness levels ranging from low to high, allowing you to customize visibility based on your preferences and environment.
You’ll typically find these settings in your device’s menu under “Display & Brightness” or similar options. The adjustment method varies by model – you might swipe down from the home screen for quick access, use physical buttons, or make changes through a companion app. Higher brightness works best for outdoor use while lower settings are more suitable for indoor environments.
Your tracker’s display technology also affects brightness performance. TFT screens are common but may struggle in bright sunlight, while OLED displays offer better contrast and vibrancy at higher power consumption.
Manual Vs Automatic Brightness Control Options
You’ll find two main approaches to controlling your fitness tracker’s screen brightness: manual adjustment and automatic sensor-based control.
Manual control gives you direct power over brightness levels, while automatic systems use ambient light sensors to adjust the display based on your surroundings. The colorful 1.69 touchscreen allows you to easily view and modify these brightness settings for optimal display quality.
Understanding the benefits of each option will help you choose the approach that best matches your lifestyle and preferences.
Manual Control Benefits
Manual brightness control offers several distinct advantages over automatic adjustment systems on fitness trackers.
You’ll enjoy immediate customization that matches your personal vision comfort and specific lighting needs without waiting for sensor responses. This direct control proves especially valuable for users with visual impairments, as settings remain stable during complex lighting shifts.
You can strategically manage battery life by reducing brightness below automatic defaults during low-activity periods, then boosting it only when necessary.
Manual control shines in challenging conditions—you’ll instantly adapt to rapidly changing environments, maximize brightness for sunny outdoor workouts, or minimize glare during nighttime activities. Unlike automatic systems that may struggle with extreme lighting situations, manual adjustment gives you complete control when sensors cannot adequately respond to unusual conditions.
Additionally, you’ll avoid potential battery drain from overly sensitive auto-brightness sensors that might unnecessarily increase power consumption.
Automatic Adjustment Features
While manual control provides hands-on flexibility, automatic brightness adjustment features offer a hands-free approach that adapts seamlessly to your environment. Your fitness tracker’s built-in light sensors continuously monitor ambient light levels, adjusting screen brightness accordingly without any input from you.
| Scenario | Manual Brightness | Auto Brightness |
|---|---|---|
| Morning jog | You’ll squint, struggle to read | Instantly readable, perfectly bright |
| Dark bedroom | Blindingly bright, disrupts sleep | Gently dims, protects your eyes |
| Sunny workout | Constantly adjusting, missing data | Automatically brightens, stays visible |
| Battery life | Drains quickly at high settings | Conserves power intelligently |
These adaptive algorithms respond rapidly to changing conditions, ensuring ideal visibility while extending battery life. You can typically toggle between automatic and manual modes through your device’s settings menu, giving you complete control over your display experience. However, some users find that auto brightness can be too bright during nighttime use, requiring a manual switch to normal brightness mode for better comfort.
Choosing Your Preference
When deciding between manual and automatic brightness control, consider your daily routine and personal preferences to determine which approach best suits your lifestyle.
Manual control offers immediate adjustment without sensor delays, letting you fine-tune brightness for unique environments or personal comfort. You’ll have independent settings for activity, general use, and sleep modes, with options for red shifts during nighttime.
However, you’ll need to actively manage brightness to optimize battery life, especially during long tracking sessions. The Always On Display feature keeps your watch face constantly visible but will impact both battery performance and overall display longevity.
Automatic adjustment provides convenience by adapting to ambient light changes without your intervention, maintaining consistent visibility while potentially extending battery life through optimized settings.
Consider whether you prefer hands-on customization or seamless automation based on your usage patterns and willingness to regularly adjust settings.
Brightness Percentage Levels and Their Applications
Understanding how different brightness percentage levels affect your fitness tracker’s performance helps you enhance both visibility and battery life for various situations.
Low brightness levels (0-25%) work best for nighttime use and indoor dim lighting, greatly extending battery life while reducing eye strain. However, they’re unsuitable for outdoor daytime activities.
Medium-low levels (26-50%) suit indoor environments with moderate lighting, balancing visibility and battery preservation.
Medium brightness (51-75%) offers ideal performance for most indoor and shaded outdoor situations, providing clear readability during workouts with moderate battery usage.
High brightness (76-100%) becomes vital for direct sunlight but consumes considerably more power. Many users report safety concerns when brightness levels are insufficient for outdoor cycling and other activities where reading essential metrics is crucial.
You’ll want custom settings for different activities, configuring separate brightness levels for exercise, general use, and sleep modes.
Screen Timeout Duration and Power Management

You’ll find screen timeout settings in your device’s display menu, where you can choose from preset durations that control how long your screen stays active after your last touch.
Your battery life directly correlates with your timeout choice—longer durations drain power faster while shorter timeouts preserve energy by minimizing idle display time. When switching from the default setting to longer durations, you’ll receive a warning message about the potential battery impact before the changes take effect.
The key is balancing visibility needs with power conservation, especially since screen usage typically impacts battery more than your fitness tracking features.
Timeout Settings Options
Three key factors determine how effectively you’ll manage your fitness tracker’s screen timeout settings: battery conservation, user convenience, and display visibility.
Most fitness trackers offer several timeout configuration options to match your specific needs:
- Preset Duration Settings – You’ll find common options like “default,” “medium,” and “long” on devices such as the Fitbit Charge 6, providing simple choices without overwhelming technical details.
- Specific Time Intervals – Advanced devices like the Fitbit Versa 4 offer precise control with 6, 8, 10, 15, 20, 45, and 60-second options, letting you fine-tune your experience.
- Device-Specific Customization – Garmin models often include backlight-specific timeout settings, while Fitbit Inspire 3 provides adjustable durations through intuitive settings menus.
You’ll access these options through your device’s settings interface, typically by swiping down or using side buttons. Proper display longevity depends on balancing your preferred timeout duration with the device’s power management capabilities.
Battery Life Impact
Your screen timeout choices directly affect how long your fitness tracker’s battery lasts between charges. Shorter timeout periods mean your display turns off faster, reducing overall power consumption and extending battery life markedly.
When you set longer timeout durations, your screen stays active longer during each interaction, which drains battery much faster.
Combined with brightness settings, timeout duration becomes vital for power management. You’ll notice that keeping your screen on for extended periods accelerates drain regardless of brightness level. High brightness settings significantly increase power consumption and should be avoided when possible.
Setting a timeout between 10-15 seconds typically balances usability with conservation.
Smart timeout management can extend your battery life by 20-30% in many cases, reducing how frequently you’ll need to charge your device throughout the week.
Outdoor Visibility in Bright Sunlight Conditions
When you step outside into blazing sunlight, your fitness tracker’s screen often becomes nearly impossible to read, even at maximum brightness settings.
The display technology in your device plays an essential role in outdoor visibility. AMOLED and LCD screens struggle with glare and washed-out colors, while MIP displays perform markedly better by using ambient light to your advantage.
To improve your outdoor experience:
- Enable maximum brightness before heading outside and use high-contrast watch faces with bold fonts
- Install anti-reflective screen protectors to reduce glare and enhance visibility
- Position your wrist strategically by angling the display away from direct sunlight when checking stats
Remember that prolonged direct sunlight exposure can cause overheating and drain your battery faster. Keep in mind that higher brightness settings will reduce your device’s overall battery life throughout the day.
Indoor Brightness Optimization for Comfort and Battery
When you’re indoors, your fitness tracker’s brightness needs change dramatically compared to outdoor conditions.
You’ll want to find that sweet spot between comfortable viewing and preserving battery life, which typically means reducing brightness to around 800-1,200 nits for ideal indoor use.
The key is balancing visibility with power consumption—too bright wastes battery, while too dim strains your eyes and defeats the purpose of having a readable display. For maximum battery efficiency, consider turning off Gesture Backlight features when you don’t need automatic activation from wrist movements.
Ideal Indoor Brightness Levels
Since indoor environments typically feature lower ambient light levels than outdoor settings, you’ll want to adjust your fitness tracker’s brightness to match these conditions for optimal comfort and battery efficiency.
The key is finding that sweet spot where your display remains clearly readable without straining your eyes or draining your device’s battery unnecessarily.
Consider these ideal indoor brightness strategies:
- Set brightness to 30-50% for most indoor activities – This range provides adequate visibility while conserving battery life in typical home and office lighting conditions.
- Use automatic brightness sensors when available – Let your device adjust brightness based on ambient light levels for hands-free optimization throughout the day.
- Enable low-light mode during evening hours – Reduce blue light exposure and prevent eye strain during nighttime indoor use while maintaining essential readability.
Premium devices like the Apple Watch 9 may require more frequent charging when brightness settings are maximized, making proper indoor brightness adjustment even more crucial for daily usability.
Battery Conservation Strategies
Maximizing your fitness tracker’s indoor brightness settings directly impacts how long your device runs between charges. Lowering screen brightness is one of the simplest ways to preserve battery life on your wearable device.
You can further extend battery endurance by disabling always-on displays when indoors, since ambient lighting often provides sufficient visibility for checking your screen manually.
Consider engaging low power mode during extended indoor activities where you don’t need full functionality. Turn off unnecessary alerts and vibrations that drain power throughout the day.
Disable features you won’t use indoors, like GPS tracking and heart rate monitoring during sedentary periods. Additionally, turn off Background App Refresh for apps that aren’t essential during your indoor sessions, as this feature can continuously drain power even when you’re not actively using those applications. These adjustments help you maintain ideal visibility while greatly extending your device’s battery life between charging sessions.
Comfort Vs Power Balance
Finding the right balance between screen comfort and battery performance requires careful consideration of your indoor environment and personal preferences.
Most indoor settings require 200–600 nits for comfortable visibility, but brightness above 300–400 nits can cause glare and eye strain during extended use.
Manual brightness controls help you achieve ideal comfort-battery balance that automatic settings often miss. These features were introduced with the 6.02 software update, ensuring users have access to comprehensive brightness customization options.
Here’s how to enhance your approach:
- Set moderate brightness levels – Aim for consistent, comfortable visibility without exceeding 400 nits indoors.
- Reduce brightness by 20% – This yields noticeable battery savings without significant visibility loss.
- Use fixed settings over auto-brightness – Manual controls prevent power variance from frequent adjustments and sudden changes.
OLED displays perform better at lower brightness levels, while LCD screens may need higher settings for adequate indoor clarity.
Nighttime Use and Red Shift Display Modes
Two primary features make fitness trackers more usable during nighttime activities: specialized display modes and automatic brightness adjustments.
Red Shift Mode transforms your display to shades of red, green, or orange, blocking blue light that disrupts night vision. This feature’s particularly valuable when you’re checking your watch in darkness without compromising your ability to see surroundings clearly afterward.
Not all devices offer Red Shift Mode, so you’ll need to verify availability before purchasing. AMOLED displays work best with this technology due to their color versatility. When activated, your entire watch interface changes colors.
Meanwhile, automatic brightness adjustment responds to ambient light conditions, ensuring ideal visibility without manual intervention. Some trackers like the Galaxy Watch Ultra automatically switch to Night mode in low-light situations. The display maintains excellent daylight visibility even during bright outdoor conditions while adapting seamlessly to darker environments.
Battery Life Impact of Different Brightness Levels
While nighttime features help you see your fitness tracker clearly in dark conditions, the brightness level you choose throughout the day directly affects how long your device runs between charges.
Higher brightness settings draw more power from your battery, and consistently using maximum brightness can markedly reduce your tracker’s overall battery life.
Maximum brightness settings significantly drain your fitness tracker’s battery, shortening the time between necessary charging sessions.
Here’s how brightness impacts your device’s power consumption:
- Frequent adjustments cause minor short-term battery drain but won’t greatly impact total battery life unless done excessively.
- High brightness usage over extended periods leads to noticeable reductions in how long your tracker lasts between charges.
- Automatic brightness features help optimize power consumption by adjusting display intensity based on ambient light conditions.
Most manufacturers set default brightness levels to balance visibility with efficient power management. Lowering screen brightness is one of the most effective ways to conserve energy and can help extend battery life significantly.
Activity-Specific Brightness Customization
You can optimize your fitness tracker’s performance by customizing brightness settings for specific activities rather than using a one-size-fits-all approach.
Exercise mode settings let you boost brightness for outdoor runs while dimming the display for indoor yoga sessions.
Sleep mode adjustments automatically reduce brightness and shift to warmer tones to minimize disruption during recovery periods. The device offers three brightness levels including dim for minimal light output, normal for moderate visibility, and max for significantly enhanced clarity.
Exercise Mode Settings
Most fitness trackers currently fall short when it comes to automatically adjusting screen brightness based on your specific workout mode, leaving you to manually tweak settings before each exercise session.
Without built-in exercise mode brightness controls, you’re forced to compromise between visibility and battery life.
Here’s what you need to know about current exercise mode limitations:
- Manual Adjustments Required – You’ll need to increase brightness manually before outdoor workouts and remember to dial it back down afterward to conserve battery.
- No Activity-Specific Settings – Your tracker doesn’t differentiate between yoga sessions requiring minimal brightness and cycling workouts needing maximum visibility against sunlight.
- Battery Trade-offs – You must choose between ideal screen readability during exercise or maintaining longer battery endurance throughout the day. Many users resort to covering their devices with wristbands as workarounds when the bright display becomes distracting in dark gym environments.
Sleep Mode Adjustments
Sleep mode provides the perfect opportunity to enhance your fitness tracker’s brightness settings, since excessive screen glare during nighttime hours can disrupt your natural sleep patterns and drain battery unnecessarily.
You can customize brightness through your device’s menu or companion app, setting specific schedules that automatically dim the display during predetermined sleep hours. Many devices differentiate between general use and sleep-specific brightness levels, allowing ideal visibility for each context.
Consider enabling battery saver mode alongside dimmed settings to extend device life overnight. If you encounter persistent brightness issues, the Community Forums offer a valuable platform where users share troubleshooting solutions and techniques with fellow fitness tracker enthusiasts.
Some trackers offer specialized sleep watch faces with reduced brightness, while others include don’t disturb modes that complement sleep settings.
You’ll find that scheduling automatic brightness adjustments eliminates the need for manual changes, ensuring your device adapts seamlessly to your sleep routine.
Always-On Display Features and Power Consumption
While always-on display (AOD) technology provides constant access to your fitness data without lifting your wrist, it comes with a notable trade-off in battery performance. AOD can drain your battery up to four times faster than standard display modes, making brightness management vital for extending usage time.
Your fitness tracker’s AOD relies on OLED or AMOLED screen technology, which consumes less power in dark areas but still impacts overall battery life considerably. Devices with the best idle autonomy often show the worst performance when AOD is enabled, highlighting potential optimization challenges.
Here’s how to optimize your AOD settings:
- Adjust brightness levels to the lowest comfortable setting for your environment
- Customize display elements to show only essential information like time and notifications
- Enable low-power modes during periods when you don’t need continuous health tracking
These adjustments help balance functionality with power efficiency.
Comparing Brightness Controls Across Major Brands
Brightness control capabilities vary dramatically between fitness tracker manufacturers, with each brand taking distinct approaches to display management and user accessibility.
Apple Watch leads with adaptive brightness and seamless iOS integration, automatically adjusting to lighting conditions.
Garmin excels in advanced controls, particularly for athletes, offering device-based adjustments on models like the Venu 3. The Garmin Fenix 3 stands out as a high-end multi-sport watch that combines fitness tracking with enhanced display features for outdoor activities.
Fitbit provides solid brightness ranges through companion apps, ensuring visibility across lighting conditions on devices like the Charge 6.
Amazfit delivers effective budget-friendly options with simple interfaces for basic adjustments.
Meanwhile, brands like Withings and Misfit offer more limited control features.
You’ll find that premium brands typically provide more sophisticated brightness management, while budget options focus on essential functionality without compromising usability.
Gesture-Controlled Display Activation Settings
You can customize these settings to match your preferences:
- Adjust gesture sensitivity – Fine-tune how responsive your tracker is to movements, preventing accidental activations during workouts.
- Enable specific wake gestures – Choose which motions trigger display activation, such as wrist raises or taps.
- Balance battery conservation – Disable unnecessary gestures to extend battery life while maintaining essential functionality.
These features enhance accessibility and provide hands-free control during exercise, making your fitness tracker more user-friendly and convenient for daily activities. Access the Settings menu by pressing and holding the down button for a few seconds to configure these display preferences.
Notification Management for Screen Power Conservation
Beyond customizing display activation, smart notification management plays a significant role in extending your fitness tracker’s battery life.
You’ll save considerable power by filtering out non-essential alerts that trigger unnecessary screen wake-ups. Enable “Do Not Disturb” modes to limit trivial notifications from lighting your display, and set importance thresholds so only critical alerts activate the screen.
Consider using vibration or sound alerts instead of screen activation for less important notifications.
When notifications do appear, choose dark mode or monochrome displays on OLED screens to reduce energy consumption. You can also shorten screen-on durations and group multiple alerts into single updates.
Smart syncing that aggregates notifications based on your activity context prevents repeated screen activations while keeping you informed. Advanced fitness trackers now use adaptive sampling techniques that intelligently adjust monitoring frequency based on detected activity patterns, further reducing power consumption during periods of minimal movement.
Text Size and Color Adjustments for Enhanced Readability
While screen brightness affects overall visibility, enhancing text size and color settings creates the foundation for comfortable long-term reading on your fitness tracker’s small display.
Apple Watch users can adjust text size by opening Control Center, tapping Settings, and turning the Digital Crown.
Apple Watch text size adjustments are easily accessible through Control Center settings using the Digital Crown for quick modifications.
You’ll also find helpful features like bold text, color filters for color blindness support, and reduced transparency options that make backgrounds less see-through for better legibility.
Samsung smartwatches offer extensive customization with font styling, sizing options, and various display settings including color adjustments and contrast modifications.
For Fitbit devices, consider these alternatives:
- Download different clock faces for improved text visibility
- Use background color reversal to enhance readability
- Enable the magnify feature on Charge 6 models to zoom in on text
Some text size changes may require you to restart your Apple Watch to take full effect.
These adjustments complement brightness settings for ideal viewing comfort.
Frequently Asked Questions
Can I Set Different Brightness Levels for Weekdays Versus Weekends?
You can’t set different brightness levels for weekdays versus weekends on fitness trackers. Most devices only offer static brightness settings that you’ll need to adjust manually whenever you want to change them.
Does Water Resistance Affect Brightness Visibility When Swimming or Showering?
Water resistance doesn’t directly affect brightness functionality, but you’ll experience reduced visibility from water droplets, glare, and reflections on your screen while swimming or showering, regardless of your tracker’s waterproof rating.
How Do Polarized Sunglasses Impact Fitness Tracker Screen Visibility Outdoors?
Polarized sunglasses can black out your fitness tracker’s screen because they block light waves that don’t align with your display’s polarization. You’ll struggle reading workout data outdoors unless you adjust viewing angles.
Can Brightness Settings Be Synchronized Across Multiple Connected Fitness Devices?
You can’t synchronize brightness settings across multiple fitness devices. While activity data syncs between connected devices, display settings like brightness must be manually adjusted on each individual device for ideal visibility.
Does Screen Protector Application Reduce Maximum Brightness Effectiveness or Clarity?
Screen protectors can reduce your fitness tracker’s maximum brightness and clarity. Matte protectors dim brightness most, while clear glass maintains better visibility. You’ll notice minimal impact with high-quality transparent protectors on small screens.
In Summary
You’ve now got the tools to optimize your fitness tracker’s display for any situation. Whether you’re adjusting brightness levels manually, setting up automatic controls, or fine-tuning gesture activation, these settings will enhance your device’s usability while preserving battery life. Don’t forget to experiment with text size and notification management to create a personalized experience that works perfectly for your daily activities and exercise routines.

Leave a Reply